+86 13638632902
 Jason@cleanroomequips.com

 MENU
MENU
Uncontrolled contamination has shifted from the cleanroom to the gowning room; cleanroom personnel flow management starts in the gowning room. With a gowning room inadequate measures, uncontrolled traffic can cross dirty to clean and open multiple doors at once, thus jeopardizing the integrity of the entire cleanroom.
Deiiang™ has successfully been contracted for cleanroom projects in all 28 countries, spanning ISO 5 to iso 8, with complete on-location testing and certification assistance for over 320 cleanrooms.
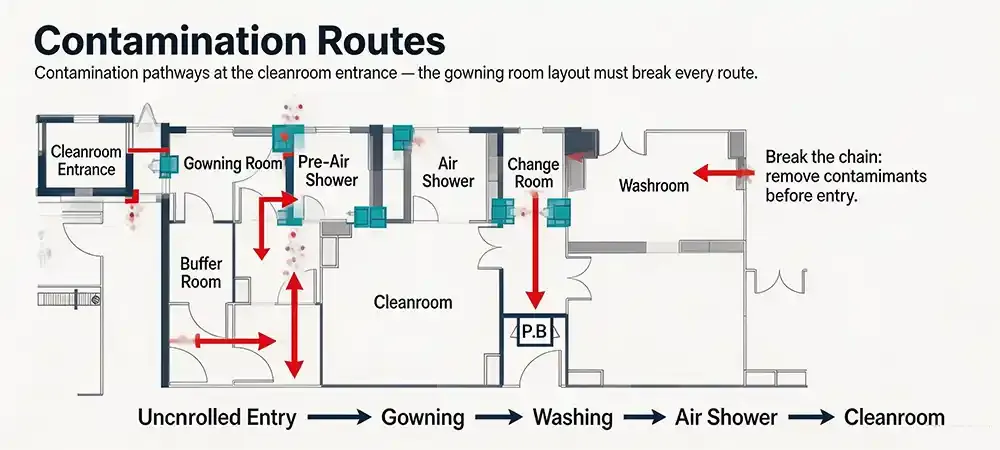
Contamination pathways at the cleanroom entrance — the gowning room layout must break every route.
What Is a cleanroom gowning Room?
Gowning rooms are more than simply changing rooms. They represent a critical buffer zone to the cleanroom, controlled at the level of physical barriers and air pressure to transfer both particles and microbes.
The gowning room layout can influence the level of adherence to procedures by personnel.
Four Core Functions of a Gowning Room
- Isolate the cleanroom from the uncontrolled corridor
- Establish a structured gowning sequence
- Restrict particle and microbe migration
- Control personnel and material access
Gowning Room, Airlock, and Changing Room — What's the Difference?
sBh9oyilUAk
These terms are often used interchangeably, but they serve distinct purposes in a cleanroom entrance design.
| Term | Primary Function | Pressure Control | Typical Use |
|---|---|---|---|
| Gowning Room | Donning cleanroom garments | Positive relative to corridor | Pharma, semiconductor, biotech |
| Airlock | Air pressure buffer & material transfer | High differential | Between clean zones |
| Changing Room | Remove outerwear, store personal items | Neutral or slight positive | General clean areas |
| Term | Function |
|---|---|
| Gowning Room | Don cleanroom garments |
| Airlock | Pressure buffer & transfer |
| Changing Room | Remove outerwear |
Industries with Different Design Priorities
Pharma, semiconductor, medical devices, and food each demand a tailored approach to the gowning room layout and cleanroom entrance.
| Industry | Typical Cleanroom Class | Gowning Stages | Gowning Time (approx.) | Key Requirement |
|---|---|---|---|---|
| Pharma (GMP) | Grade A – D (ISO 5-8) | 2-3 stages | 5-10 min | Aseptic processing, microbial control |
| Semiconductor | ISO 5 – 8 | 1-2 stages | 3-6 min | Particle & static control |
| Medical Devices | ISO 7 – 8 | 1-2 stages | 3-5 min | Risk-based validation |
| Food / Cosmetics | iso 8 | 1 stage | 2-4 min | Hygiene, easy-clean surfaces |
Understanding Dirty Zone vs Clean Zone
The separation of clean area and dirty area marks the basis of efficient gowning room design.
In absence of clear demarcation, people may end up contaminating the cleanroom, making the entire sterilization operation futile.
What Is the Dirty Zone?
The "dirty zone" is where employees take off shoes worn outside, deposit their bags, and change clothes that are not meant for the cleanroom. The term "dirty" here refers to how clean the area is in relative terms, not how dirty it is visibly.
What Is the Clean Zone?
The "clean zone" is where fully-gowned staff members check everything thoroughly before entering the cleanroom. Everything from surfaces and storage to behavior of staff is strictly controlled.
How to Establish a Clear Dirty–Clean Boundary
Cross-over bench: The staff sits on the bench while they move the leg above the dirty side of the bench.
Changing the color or type of flooring: The change in color or type serves as an indicator of the border.
Barrier: Some rooms are assigned for the dirty activities while others for clean ones.
Design insight:The main conclusion is that the cross-over bench is not a piece of furniture; it is a tool for controlling the behavior of staff.
Dirty Zone
Remove outerwear & shoes
Transition Zone
Hand cleaning & garment donning
Clean Zone
Final inspection & airlock entry
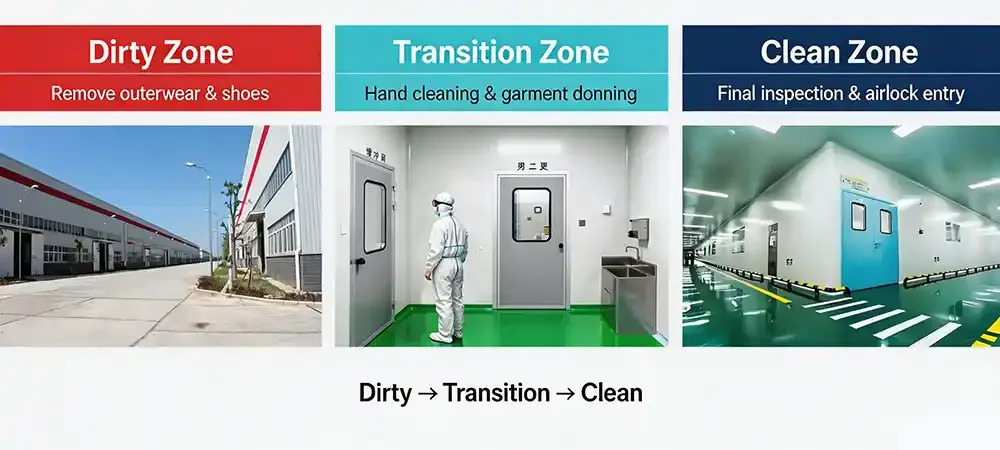
Clear transition from dirty to clean with change of colors on both the floor and the benches.
The gowning room prevents contamination only if the location is properly designed and the workflow follows the same sequence.
How to Plan an Effective Gowning Room Layout
Every gowning room layout begins with specifications based on actual empirical data from the site instead of relying on a generic design. The total design must reflect busy periods, garment types, and exit pathways.
Knowing the cleanroom entrance design parameters in advance minimizes the potential for costly rework.
Step 1 — Determine Personnel, Shifts, and Peak Throughput
- Total staff per shift
- Peak simultaneous gowning personnel
- Male / female or separate changing needs
- Visitor-to-staff ratio
- Gowning frequency and shift handover
- Future expansion capacity
Deiiang™ design approach:We determine the appropriate gowning room dimensions based on maximum occupancy (not overall number of people) and verify the layout by running a simulation of the gowning process.
Step 2 — Establish a One-Way Personnel Flow
A typical entry sequence follows this logic:
ENTRY Uncontrolled Corridor → Access Control → Remove Outdoor Items → Hand Cleaning → Cross-over Bench → Don Cleanroom Garments → Mirror Check → Personnel Airlock → Cleanroom
If feasible, exit pathways must be kept separate. Otherwise, it is advisable to apply time access or local segregation to limit any risk of overlap.
Step 3 — Size by Gowning Actions, Not by Room Area
Designers must consider:
- Space for bending down to put on shoe covers
- Clearance to prevent garments touching walls or floor
- Door swing clearance
- Gown storage and dispensing zones
- Emergency evacuation and accessibility
- Cleaning equipment access
gowning area Sizing Formula (Deiiang™)
Atotal = Npeak x (Abench + Aaction) + Astorage
Where: Npeak = peak simultaneous gowning staff; Abench ≈ 0.8 m2 per person (cross-over area); Aaction ≈ 1.2-1.8 m2 per person (gowning motion); Astorage = garment racks, dispensers, waste bins.
Typical minimum per person: ISO 5-7 → 2.5-3.5 m2; ISO 8 → 2.0-2.8 m2.
Interactive gowning area Calculator
Adjust the parameters below to estimate your required gowning room size.
0.5 m2 (tight) 3.0 m2 (spacious)
Calculated Total Area 18.8 m2
Area per Person 3.13 m2 per person
Status & Suggestion Good: Area sufficient for ISO 5-7
Estimated Room Size (W x D) approx. 4.0 m (W) x 4.7 m (D)
* Bench area fixed at 0.8 m2/person. Values are preliminary design references.
Three Common Layout Forms
- Single-room zoned: Compact, low-risk projects. Limited segregation.
- Two-stage gowning: Outerwear removal separated from cleanroom garment donning.
- Multi-stage / gender-separated: Large pharma, biotech, or high-traffic facilities.
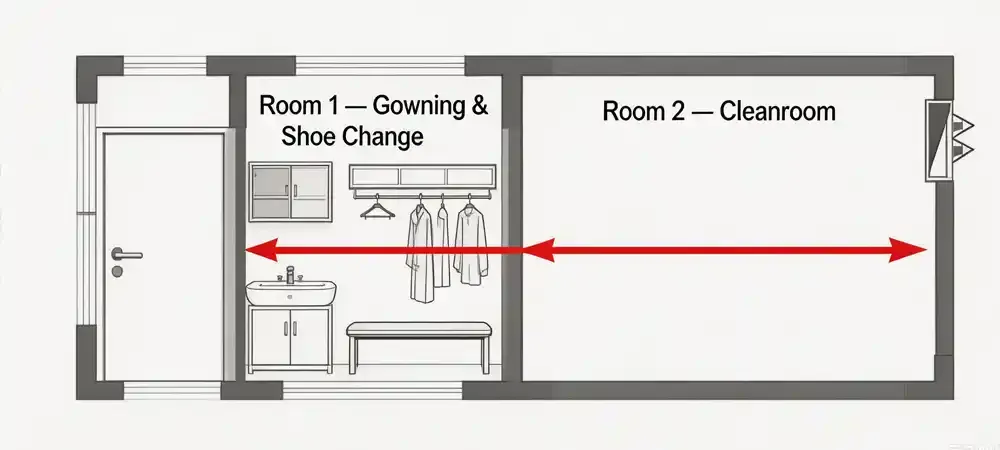
Single-room zoned
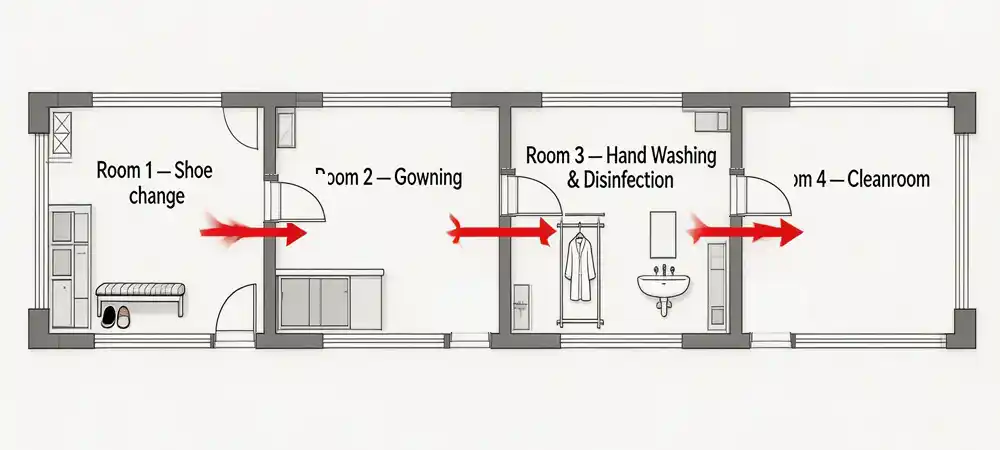
Two-stage gowning
Three common gowning room layouts compared: single-zone, two-stage, and multi-stage.
Cleanroom Entrance Design Requirements
The entrance to the cleanroom is the last barrier before personnel access the production area. Every component within the cleanroom — doors, interlocks, and pressure — must be in sync.
A properly constructed cleanroom entrance minimizes the possibility of particles entering the cleanroom, while also aiding the overall arrangement of the gowning space.
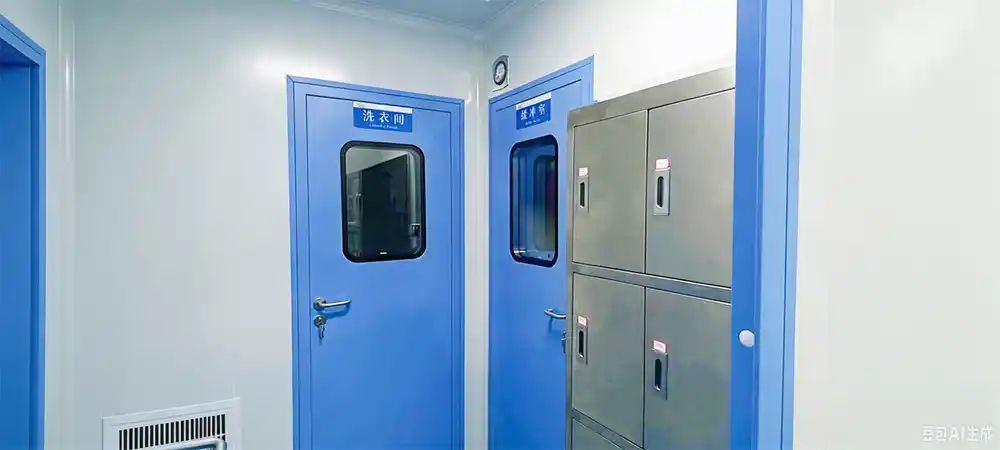
Doors, Interlocks, and Access Control
- Door surfaces smooth, easy-clean, no dust traps
- Hardware minimized, flush-mounted
- Interlocked doors (one opens at a time)
- Emergency release and fire alarm integration
- Separate access levels for staff and visitors
- Door swing direction aligned with air pressure and fire egress
Deiiang™ cleanroom door data:The thickness of the panels is 50 mm, made of galvanized steel (with a thickness of frame 1.2 mm and 0.8 mm for the leaf plate), double glazed vision panel measuring 600 x 400 mm, automatic drop-down bottom seal, optional interlock and access control.
Pressure, Airflow, and Air Change Design
- Pressure differential between adjacent areas
- Impact of door opening on pressure decay
- Supply and return air placement
- Particle generation from gowning actions
- Recovery time and real-occupancy testing
Pressure Recovery Time – Engineering Insight
When the door is opened, the differential pressure drops instantaneously from 15 Pa to only 3 Pa in two seconds. Deiiang's HVAC design allows recovery to 90% of set point within a period of 20–30 seconds after the door is closed, thus preventing external air from entering.
Temperature, Humidity, and Personnel Comfort
Wearing multiple layers raises body temperature. Uncomfortable conditions lead to skipped steps or rushed gowning, increasing contamination risk.
Walls, Ceilings, and Floor Materials
Deiiang™ offers a full range of cleanroom panels:
- Panel types: Glass-magnesium, rock wool, aluminum honeycomb, PU, carbon honeycomb
- Thickness: 50-100 mm
- Surface: Color-coated steel, stainless steel, electrolytic steel
- Fire rating: A1 to B depending on core
- Accessories: Coving profiles, sealing strips, cleanroom windows
Gowning Equipment and Placement
All pieces of equipment in the gowning area should be positioned in a way that promotes flow from dirty to clean aspects of the gowning area and does not interfere with it.
Proper placement of equipment helps in arranging the gowning area correctly and making it clear where the dirty area ends and clean area starts.
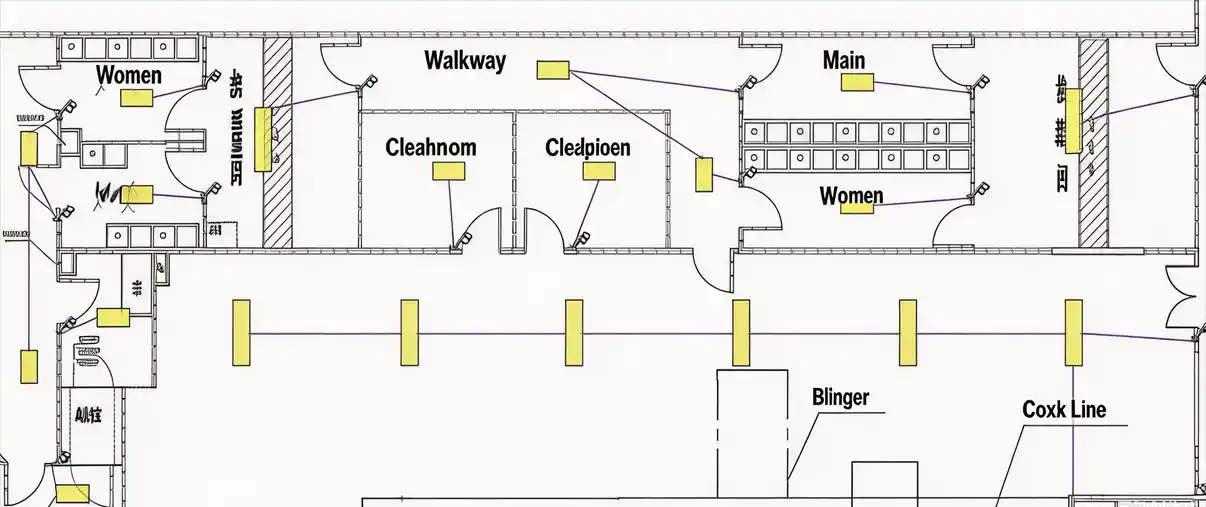
Cross-over Bench
Width: 1200-1800 mm, height 400-450 mm. Must prevent bypass.
Gown Storage and Dispensers
Separate storage for unused, in-use, and soiled garments.
Handwashing and Sanitizing Facilities
Sinks must be placed away from the clean gowning zone to avoid splashing.
Mirrors, Waste Bins, and Garment Inspection
Mirrors for checking hair, masks, cuffs — not decoration. Covered bins in dirty zone.
Is an air shower Necessary?
air showers are not a default solution. Necessity depends on risk, garment system, traffic, and validation.
Deiiang™ air shower data: Nozzle count 16-32, air velocity 20-28 m/s, HEPA H13/H14 filtration, interlocked doors.
Designing the gowning procedure Around the Room
A typical 8-step sequence:
- Check access permission
- Remove outerwear, jewelry
- Change shoes or put on shoe covers
- Hand hygiene
- Don garments in prescribed order
- Cross the dirty–clean boundary
- Put on gloves and final adjustments
- Visual inspection using mirror
- Enter airlock to cleanroom
Deiiang Cleanroom Gowning Room Project Case Study
Deiiang™ has delivered cleanroom solutions across multiple industries. Below is a representative project.
Industry
Pharmaceutical
Location
Southeast Asia
Cleanroom Class
ISO 7
Peak Personnel
24 staff
Project Photos
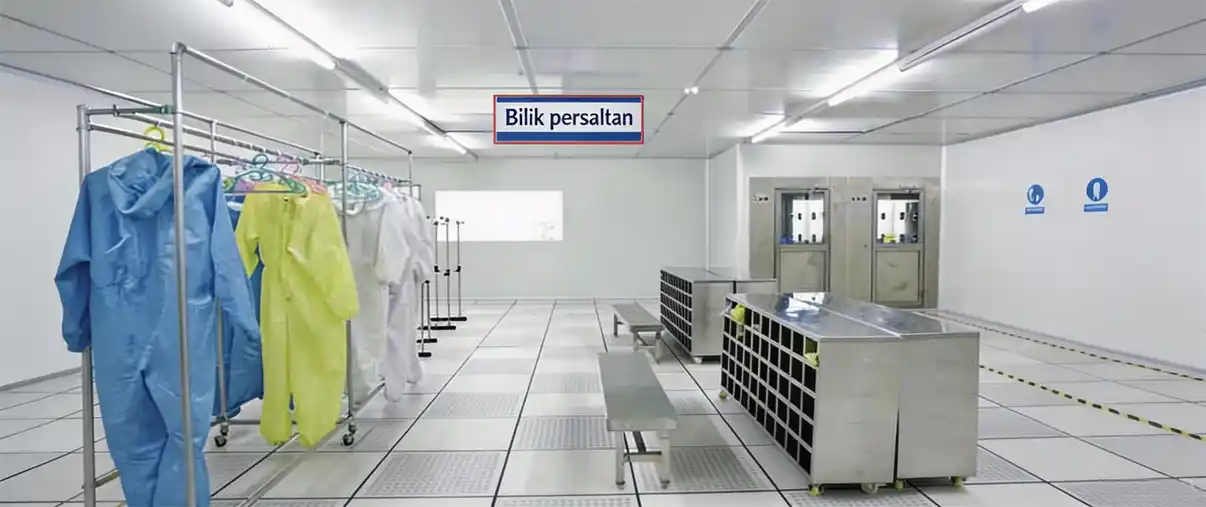
Challenges & Solution
- Limited floor area, peak-hour congestion, pressure fluctuations
Deiiang was reconfigured to a two-stage configuration, a 1200 mm cross-over bench with floor boundary was installed, interlocked doors with 15 Ps cascade were installed, all this work was completed in 12 days from start to finish. The tests confirmed that the installation was in accordance with ISO 7 standards.
Validation Thresholds
HEPA PAO leak test≤0.01%
Pressure differential≥15 Pa
Recovery time (90%)≤30 sec
Self-clean time<15 min
Post-Case Action Checklist
Progress 0/9
Peak personnel flow has been calculated
Dirty and clean zones have a visible physical boundary
Entry and exit routes do not create uncontrolled crossover
Doors, interlocks and emergency release logic are defined
Gown storage is separated by status
Pressure relationships are documented
Cleaning agents are compatible with all room finishes
The layout has been reviewed through a gowning simulation
Testing, training and handover documents are included
Common Cleanroom Gowning Room Misconceptions
Myth
Smaller rooms cost less.
Overcrowding leads to garment contact and queue delays. Long-term operational cost often exceeds initial savings.
Myth
A cross-over bench alone creates a boundary.
If staff can walk around it, the bench is ineffective.
Myth
An air shower solves all contamination.
Cannot replace garment systems, SOPs, training, and monitoring.
Myth
One layout works for all industries.
Pharma, semiconductor, and food have different risks and requirements.
Project Process: From Requirement to Handover
1. Requirement Collection
Floor plans, class, personnel, utilities, budget.
2. Site Assessment
Area, structure, logistics, HVAC, construction window.
3. Concept Layout & Simulation
Zoning, equipment placement, entry/exit flows. Physical walk-through recommended.
4. Detailed Design
Wall, ceiling, door, HVAC, electrical, interlock drawings.
5. Quotation & Technical Confirmation
Define inclusions, exclusions, options clearly.
6. Manufacturing, Shipping, Installation
Custom fabrication, international shipping, on-site coordination.
7. Commissioning & Validation
Airflow, pressure, HEPA leak, particle count, interlock checks.
8. After-sales & Maintenance
Filter replacement, seal checks, pressure monitoring.
Cost Factors and Delivery Considerations
Main Cost Drivers
- Room area and layout complexity
- Cleanroom class and HVAC
- Materials (walls, doors, floor)
- Air shower, pass-through, access control
- Testing, documentation, validation
- Project location and shipping
Deiiang Cost Breakdown (illustrative)
- Design & engineering: 12-18%
- Enclosure: 30-40%
- HVAC & filtration: 20-30%
- Equipment: 10-15%
- Installation & testing: 10-15%
Delivery Timeline
Requirement → Design → Procurement → Manufacturing → Shipping → Installation → Handover
What to Confirm Before Purchasing
- Cleanroom class (static/dynamic)
- Design headcount vs. peak concurrency
- Applicable ISO, GMP, local standards
- Garment type and gowning sequence
- Equipment, electrical, control interfaces
- Material compatibility with cleaning agents
- Inclusions: shipping, installation, testing
- On-site utilities and civil works responsibility
- Acceptance criteria, documentation, training
- Spare parts, warranty, after-sales
Frequently Asked Questions
What the ideal layout seems to be?
The simple answer is there is no ideal layout. There are too many variables to consider.
What contributes to the differentiation of clean and dirty areas?
Floor changes, cross-over bench, or cross-over elements and physical barriers.
What is the ideal size?
Usual minimum area is 2.5 to 4 m2 per person. Use the above calculator for personalized values.
What about an air shower?
air showers are not a requirement, but can be a useful precautionary measure.
What about a dedicated entry and exit?
Preferred, but if time-based segregation is the main method, then it's unnecessary.
What needs to be included to get a quote?
Class of cleanroom, equipment in the cleanroom, floor plan, personnel, peak personnel in the cleanroom, location, timeline, and industry.
What about Design and Installation?
Time can fall somewhere between 4 to 12 weeks. Deiiang™ provides a timeline for openings.
What tests are done before the cleanroom is handed over?
Interlock function, particle counting, filters, airflow, and pressure.
Conclusion
A successful design for a gowning area has the following characteristics: it incorporates an entrance to the cleanroom, clearly marking the boundary between the unclean area and the clean one; it promotes a logical workflow; and it influences the necessary behavior with the help of spatial design.
In a space where the procedures and the environment work well together, prevention of contamination becomes effective and permanent.
References
- ISO 14644-1:2015 — Cleanrooms
- EU GMP Annex 1
- FDA Guidance — Sterile Drug Products
- ASHRAE Handbook — Clean Spaces
- IEST-RP-CC012