+86 13638632902
 Jason@cleanroomequips.com
 MENU
MENU
A structural layer applied to the base slab, floor slab, or filler layer (lightweight, loose material) for leveling, sloping, or reinforcement.Composed of epoxy resin, hardener, thinner, and other additives, it is applied directly to the substrate during epoxy flooring construction to provide sealing and adhesion.
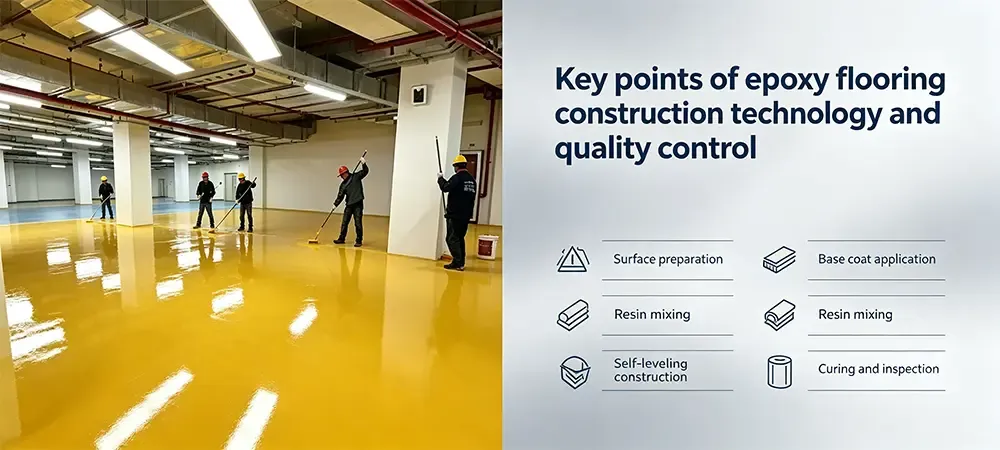
Construction Methods
1. Overall Construction Diagram
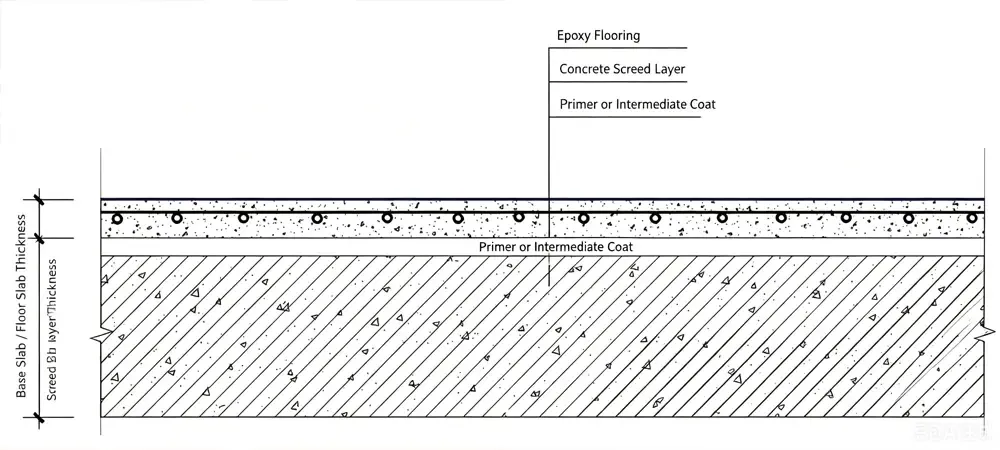
2. Epoxy Flooring Construction
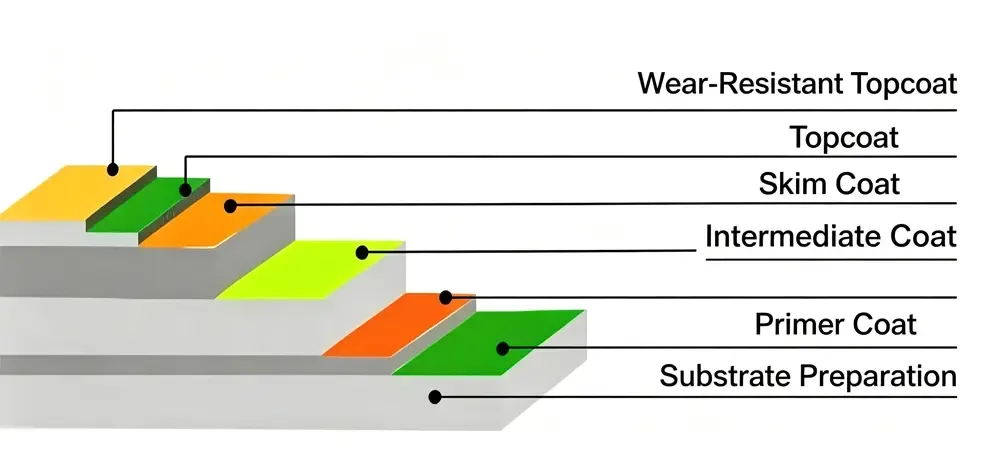
Material Control Points
Maximum particle size of coarse aggregate in concrete shall not exceed 2/3 of the surface layer thickness;
Ready-mixed concrete with strength grade not lower than C30, water-cement ratio ≤ 0.50, slump controlled within 140±20mm;
Concrete leveling layer reinforced with single-layer bidirectional steel mesh φ8@200;
Driveway surface: preferably 4.0mm thick epoxy orange-peel anti-slip flooring; garage ramp: preferably 5mm thick epoxy anti-slip, noise-reducing, wear-resistant flooring; parking spaces and surrounding areas (non-driveway): preferably 2mm thick epoxy flooring (subject to design).
Construction Process
1. Leveling Layer (Base) Construction
Develop plan → Elevation survey → Clean substrate → Drainage plastering → Mortar spots → Rebar tying → Concrete pour → Level & trowel → Cure 7 days → Cut dummy joints
2. Epoxy Flooring Construction
Substrate prep → Primer → Intermediate coat → Putty troweling → Topcoat → Wear-resistant finish
Acceptance Standards
Base layer shall be flat, clean, and its moisture content meet coating technical requirements.
Concrete strength grade shall meet design requirements and be no less than C30.
Thinnest part of concrete leveling layer ≥ 50mm, thickest ≤ 100mm.
Topcoat surface free from cracks, hollows, missed areas, backflow, or water accumulation.
Paint materials must have test reports confirming benzene, toluene, dodecyl, VOCs, and free TDI within limits.
Leveling coat smooth and scratch-free.
Surface uniform in color, no blistering, peeling, or sandblasting.
Curing time ≥ 7 days; foot traffic allowed only after compressive strength ≥ 5 MPa; normal use after design strength reACHed.
Flatness deviation <2mm checked with 2m straightedge and wedge gauge.
Detailed Construction Plan Preparation
Prepare a project-specific construction plan defining workload, manpower, mACHinery, materials, schedule, and quality requirements.
Measure basement length, width, and column spacing; plan expansion joint locations digitally. Adjacent blocks along longitudinal and transverse joints shall be poured in two stages; control single-pour range via joint design:
Longitudinal expansion joints ≤ 6m (or based on column spans), using flat-head joints;
Transverse expansion joints ≤ 24m (or based on column spans), using flat-head joints;
Rebar in different blocks shall be tied in one go;
Transverse partition joints ≤ 12m, using dummy joints cut later;
Partition joints 200mm around column bases, dummy joints cut later, can be parallel or diamond-shaped;
Partition joints 200mm around equipment foundations, dummy joints cut later.
Elevation surveying:
Verify all basement horizontal points match the site handover points; mark 1m elevation control lines on walls and columns.
Measure and record all existing slab elevations; calculate each axis elevation based on slope coefficient, direction, and minimum thickness, then mark on plan.
Step-by-Step Execution
1. Substrate Cleaning
Remove loose concrete around columns and walls; clean thoroughly.
Clear all debris; use floor cleaning machine to remove concrete residue.
Remove raised spots, wash with water, and clean again.
All foundation slab leaks must be repaired before starting epoxy flooring construction.
2. Drainage Ditch Plastering
Shallow ditches: Mark lines, install formwork; after pouring leveling layer, remove formwork, plaster both sides with rounded corners; set longitudinal slope toward sump.
Deep ditches: Mark control lines, apply 1:2 cement mortar; weld angle steel based on elevation and slope, anchor with Φ12 bars ≤500mm apart; control clearance ≤1500mm, weld Φ12 bars; fill gaps with fine aggregate concrete and smooth.
3. Mortar Spots
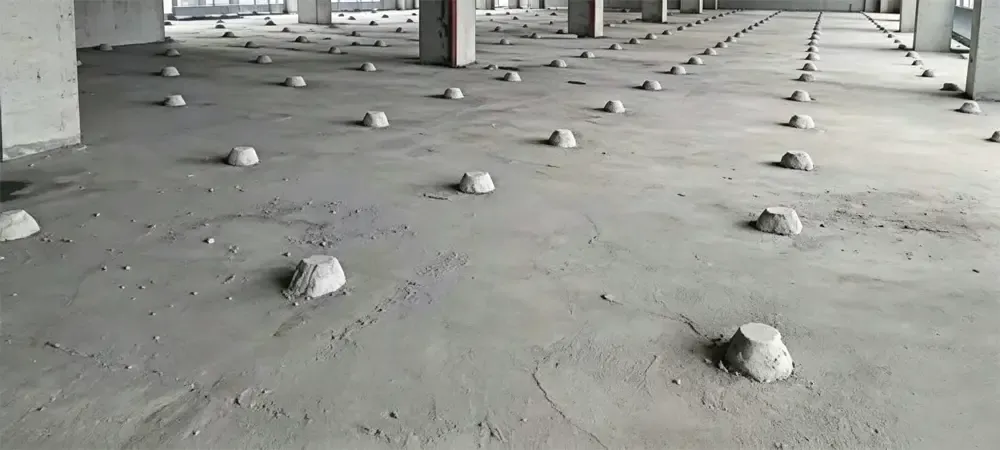
Based on horizontal control lines and slope coefficient, apply mortar spots (same mix as concrete) at ≤3m intervals, both horizontally and vertically. Spot elevation equals finished surface elevation.
(image)
(image)
4. Rebar Tying
Construct per drawings; control protective layer thickness between 1.5cm and 2.5cm. All rebar must be tied in one operation.
5. Concrete Pouring
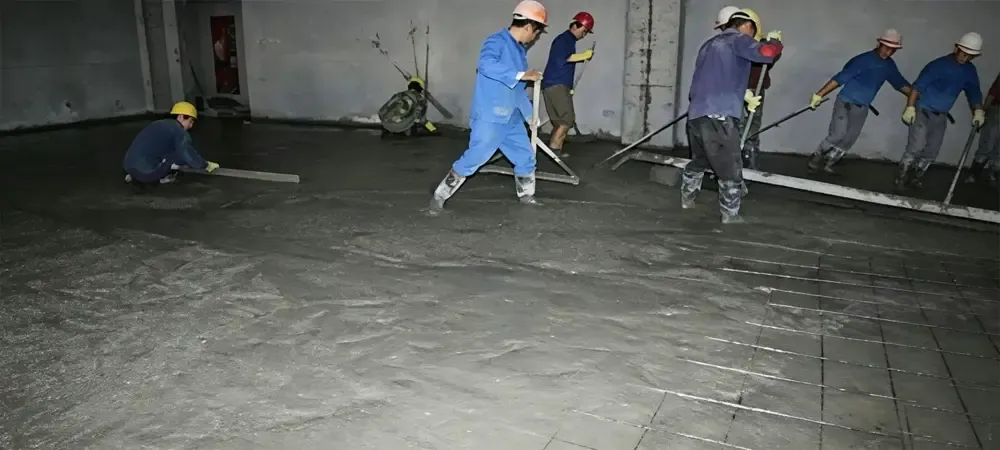
Thoroughly moisten the base one day in advance; rinse clean and allow to dry.
Before pouring, moisten the surface, remove debris, and apply a 1:0.4–0.5 cement slurry evenly. Pour concrete immediately after slurry application.
Use ready-mixed concrete delivered by mixer trucks and transported to site by motorized buggies. Compact with plate vibrator, then roll with a 6m-long, 110mm-diameter roller. Level with flat shovel where needed. Remove excess mortar during rolling, then roll again to ensure flatness.
After initial set, use a grinder to remove the surface laitance.
(image)
6. Base Leveling & Troweling
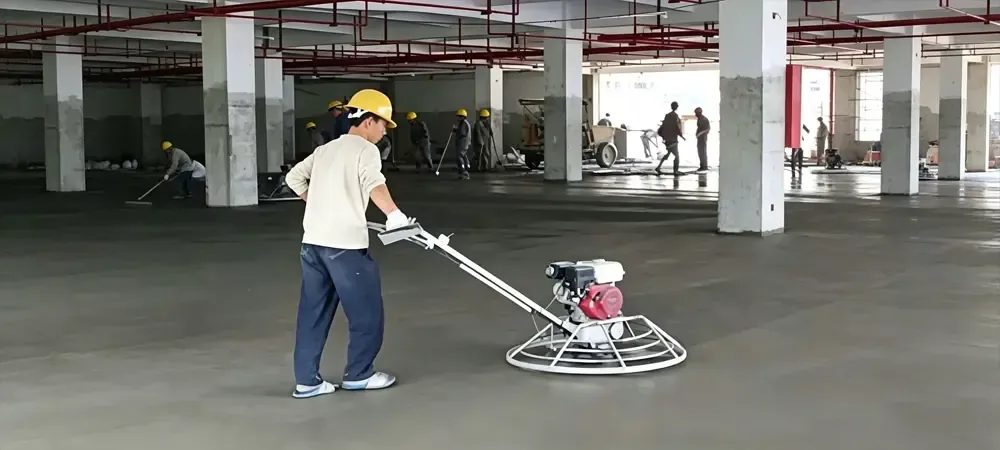
When concrete has initially set (approx. 3–4 hours), use a power trowel with disc attachment to grind and smooth the surface progressively from perimeter inward.
7. Curing
5–6 hours after final troweling, apply curing compound at 0.2L/m² (spray, brush, or roller), then cover with film or cotton felt. Cure for at least 7 days; keep foot traffic off until strength exceeds 5 MPa.
(image)
8. Dummy Joint Cutting
After 7 days of curing and strength >5 MPa, mark grid joint lines per layout.
Cut with a saw: width 5–12mm, depth = 1/3 of poured thickness, continuous line.
Perform a test cut in an inconspicuous area first.
After cutting, clear debris and dust, rinse with water.
(image)
(image)
9. Substrate Preparation for Epoxy
Grind and clean the concrete base to roughen the surface, enhancing bond for epoxy flooring construction.
For open areas, use a shot blasting machine (deep grooves, fast, low dust). For small bays or edges, use a milling machine (more dust, shallower grooves).
After treatment, remove loose dust, oil stains, and debris from joints. Ensure surface is sound, dry, and moisture content meets requirements before applying epoxy.
The interval between leveling layer and epoxy flooring construction should be at least 28 days to allow full drying of the substrate.
10. Primer Application
Mix epoxy primer and hardener according to ratio; adjust viscosity as needed. Apply within 4 hours.
Roll or squeegee apply—thin, even coat with glossy finish. Touch up dull areas; increase roller passes for better penetration.
Penetration and hardening time: 6–8 hours. After hardening, proceed to next coat; ensures strong adhesion and dust sealing.
🖌️ Primer rolling
11. Intermediate Coat
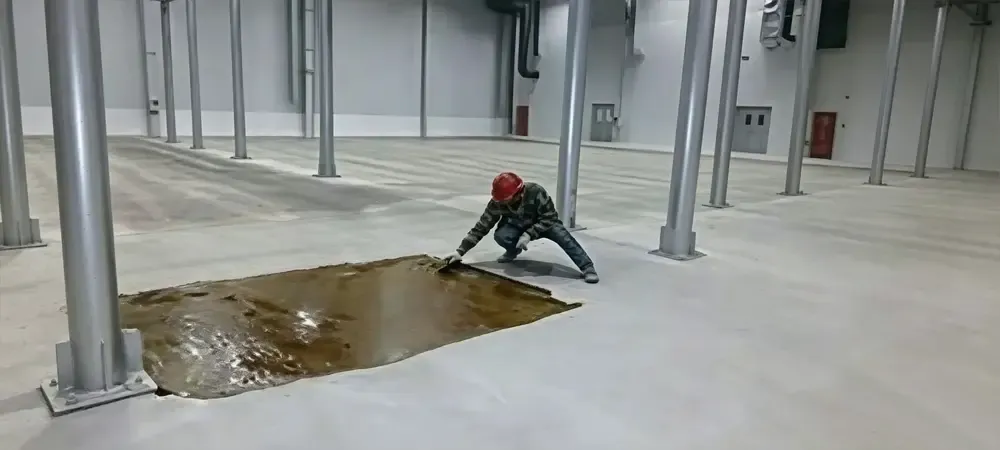
Mix intermediate base and hardener; may add quartz sand for density and strength. Apply within 4 hours.
Pour mixed material onto floor and spread evenly with trowel; apply one full coat.
After curing, sand down any trowel marks or defects and clean thoroughly.
Typical hardening time: 12 hours; then proceed.
For driveways/ramps, add an extra "anti-slip layer" during this stage: repeat intermediate coat with quartz sand broadcast and anti-slip aggregate; ensure 60% of particles are embedded.
(image)
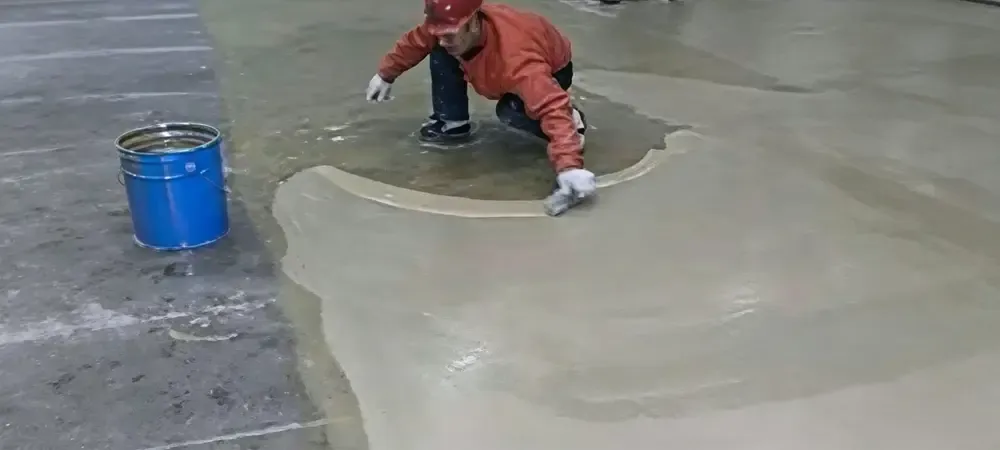
12. Putty Troweling
Mix specified color epoxy base with quartz sand to form putty; apply within 4 hours.
Pour and spread evenly with trowel; apply two full coats.
Curing time: approx. 8 hours; then proceed.
After curing, the surface is hard, smooth, and glossy. Apply topcoat soon after to ensure good intercoat adhesion; long intervals may cause delamination.
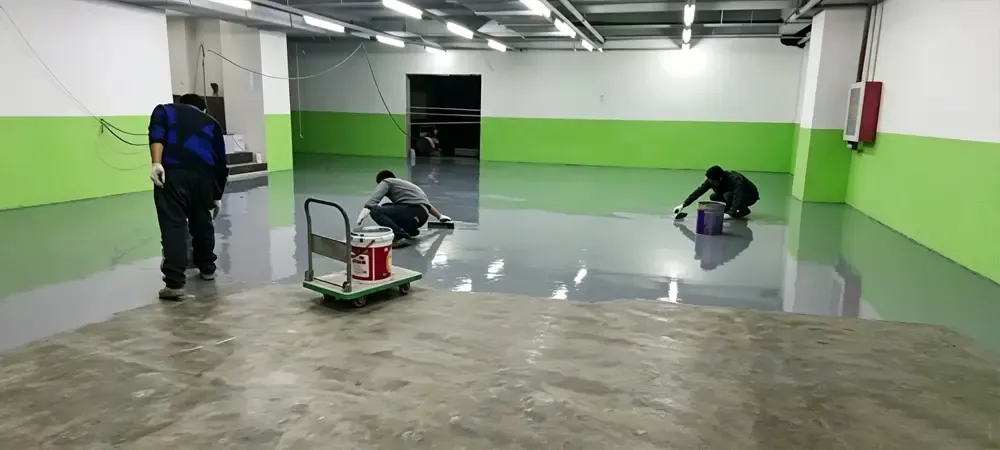
13. Topcoat Application
Surface must be clean; remove any adhering debris.
Mix specified color topcoat base and hardener; apply within 4 hours.
Roll evenly to achieve uniform color, no runs, pinholes, or missed areas.
For driveways/ramps, use a textured roller to create orange-peel finish for slip resistance.
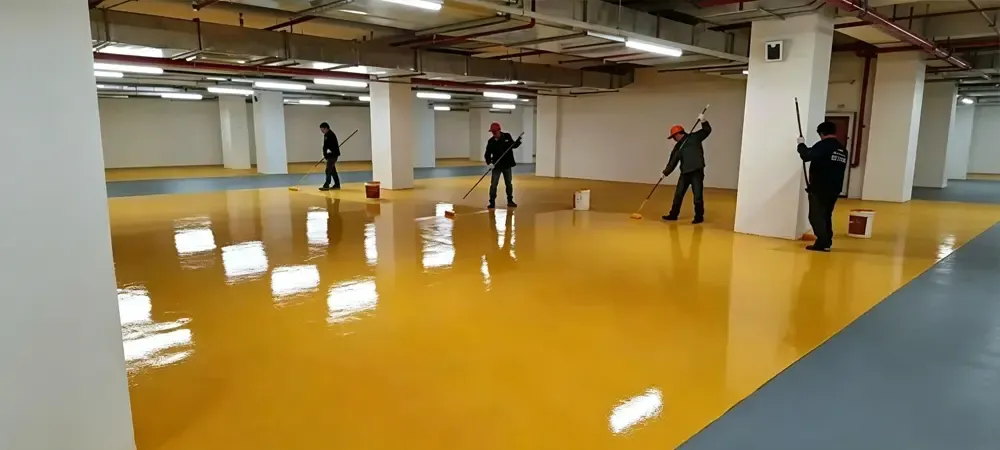
14. Wear-resistant Clear Finish
After topcoat cures for 12–24 hours (no skin marks), apply one coat of wear-resistant clear varnish to enhance gloss, hardness, wear resistance, and service life.
Foot traffic allowed 24 hours after application; heavy loads only after 72 hours.
✨ Clear varnish finish
Precautions
Substrate moisture content should generally be below 8%. Two common test methods:
Use a moisture meter;
Place a 45cm plastic film flat on concrete, seal edges with tape. After 16 hours, if water droplets appear or concrete surface darkens, the substrate is too wet for epoxy flooring construction.
In hot weather and confined spaces, solvent evaporation may cause suffocation; ensure adequate ventilation.
Low temperatures delay curing; use heaters to raise temperature, and store paint/hardener in warm room one day in advance to reduce viscosity and improve leveling.
In winter mornings, condensation may appear on primer; apply subsequent coats only after primer is fully dry.
When using different colors of topcoat, use masking tape to demarcate areas per color chart before painting.
— End of Document —